Pages

Thursday, January 17, 2013

Dollar Crafts - Butterfly Boxes

I was walking around Hobby Lobby with Ava and Sidney after Christmas looking for some good after Christmas deals.  Little did I know that Ava and Sidney had their own agenda.  They love walking around the wood and paper mache area of the store and picking out something to paint.  On this trip, they found these cute butterfly-shaped boxes made of paper mache.  They were less than a dollar each because they were on sale 50% off!   


When we got home the girls wanted to paint them right away:


Here are the painted butterfly boxes:


The girls love to hide little treasures inside:


Pin It

Monday, January 14, 2013

Banana Nut Bread with Chocolate Chips


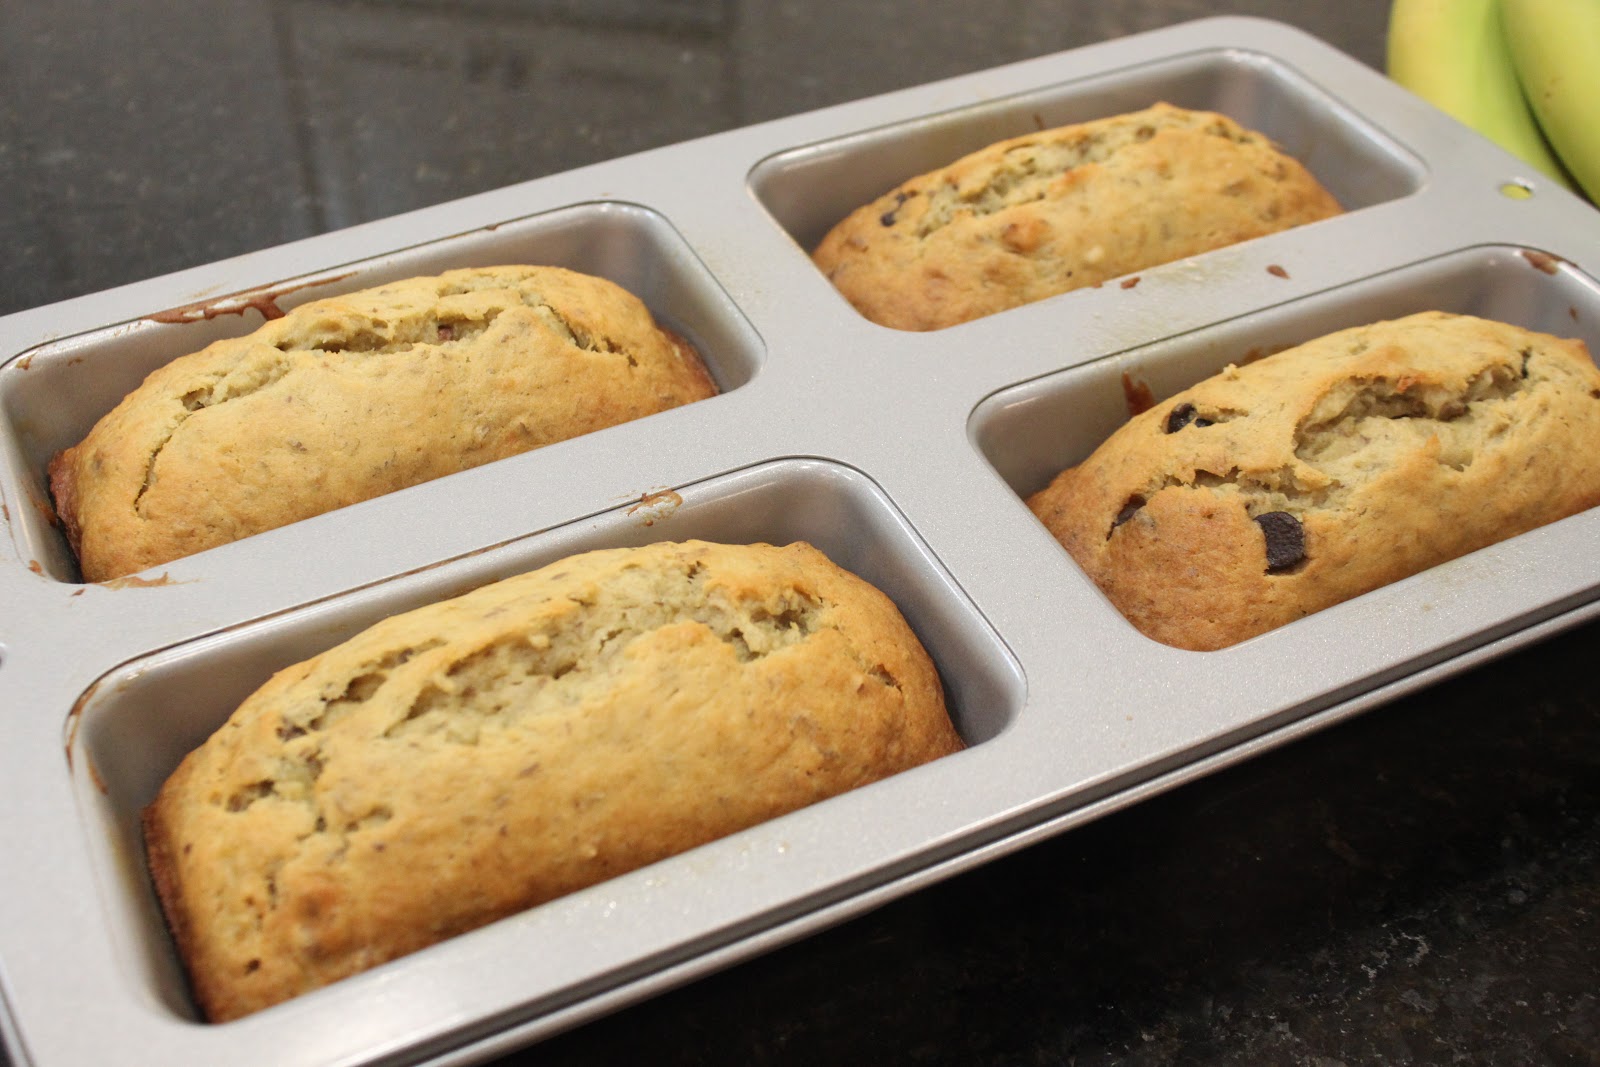
I have never made Banana Nut Bread (until now).  I think it's because I can never wait for the bananas to become over-ripe.  Then, the other day I noticed 3 bananas that were getting pretty brown, but still edible.  Perfect!  I found a recipe and miraculously had all the ingredients that I needed at home plus a couple extras that I like to add to my sweet breads.  I have to pat myself on the back because that bread was pretty amazing.  Here's all the info you need to make your own delicious Banana Bread.


Ingredients:
3/4 cup of sugar
1 1/2 cups of mashed ripe bananas (3 large)
3/4 cup of vegetable oil
2 eggs
2 cups flour
1 Tbsp Flax Seed Meal (optional, but it's healthy and you won't even notice a difference in the taste - promise!)
1/2 cup chopped nuts (I used walnuts and pecans because that's what I had on hand)
1/2 cup semi-sweet chocolate chips (optional, but who doesn't like chocolate??)
1 teaspoon baking soda
2 teaspoons vanilla
1/2 teaspoon baking powder
1/2 teaspoon salt

Instructions:
1.  Heat oven to 325 F.
2.  Grease a loaf pan with non-stick baking spray.
3.  Mix sugar, bananas, oil and eggs. 
4.  Stir in the remaining ingredients and pour into the loaf pan.
5.  Bake until a wooden toothpick inserted in the center of the bread comes out clean, 60- 70 minutes. 
6.  Let cool 10 minutes, then loosen sides of loaf pan and remove from pan. Let cool completely before slicing.

Makes 1 large loaf or 4 mini loaves.


Pin It

Friday, January 11, 2013

My Favorite Pinterest Valentine Cards

I love helping Ava make Valentine's to pass out to her friends at school.  I think I may enjoy making them more than Ava.  I'm always looking for cute, nut-free ideas since Ava's preschool is nut-free.  I started looking on Pinterest to find some ideas for this year's Valentine's.  Here are my favorites:


The arrow could be a fun pencil or straw or a glow stick.

You could insert a pencil or a lollipop through the butterfly wings.

If you don't have a heart shaped stamp you could use stickers instead.


You could also use the fun rulers with stencils or colored rulers.


This one is my favorite!  The head is a lollipop wrapped in tissue paper and I think Ava could help with a lot of it.

Happy Valentine's Day!

Pin It

Wednesday, January 9, 2013

Dollar Crafts - Painting with Painters Tape

Over the Christmas holiday the girls were painting in our art room and I happened to have some painters tape laying around.  {Leftover from my attempts to decorate the walls in the art room - a project that is proving to take much longer than expected...}

I found some card stock (you'll want to use thick, heavy paper so that you don't tear the paper when you remove the painters tape) and created hearts using painters tape:


Then the girls went to work painting all over the paper (Please forgive me for always taking pictures of my kids in their PJ's and bedhead.  We don't get out much these days because of baby Clara so I don't find it to be important to be dressed up just to sit around the house all day.):


Then let the masterpiece dry with the painters tape in place:


Once the paint is dry, carefully remove the painters tape to reveal your heart:


The girls were amazed at how this turned out.  These would be cute to frame and hang in the art room or their bedrooms.

Pin It

Monday, January 7, 2013

Happy 35th!


Today is my hubby's 35th birthday!  I hope he will forgive me for my lack of birthday planning.  I'm still getting used to life with 3 little ones.  I usually decorate the house and get a cake.  Not this year.  I have no balloons, no crepe paper, no cake, and no gifts (unless you count the boxers that I found 40% off at Gap this past weekend that I'm going to try to pass off as a gift).  Pretty pathetic.

Tim's parents came over on Saturday night and we celebrated the January birthdays at my mom and dad's house last night so his birthday was not forgotten entirely.  And it was spent with family which is what matters most.


His parents are coming over to watch the girls tonight so we can have a night out!  That really is the best gift EVER!  And even though it's not from me, I hope it makes his day special. It's our first night out since Clara was born.  Much needed and much appreciated.  Thank you Nana and Papa Reeves!!!

Pin It

Thursday, January 3, 2013

Chocolate Covered Peppermint Ritz

Happy New Year!  It's taken me a while to get back into my blogging routine, but I'm back now.  We had a nice, quiet Christmas this year.  With Clara still being so young, I was apprehensive about having her around lots of people so we cut back on some of our activities this year.  It was very relaxing.

Have you discovered the Limited Edition Fudge Covered Ritz?

They are one of my FAVORITE holiday treats.  I think I bought 6 boxes this year.  They're only offered at Christmastime so get them while the gettin's good!

I feel a little bit guilty enjoying all these Christmas treats when Sidney, my 2 year old, cannot eat any of it.  She loves Ritz so I decided to try to make her a dairy-free version of Fudge Covered Ritz.  


I used Baker's Semi-Sweet Baking Chocolate Square (Note: They are made on equipment that processes milk. I think next time I will use a different chocolate).  I also crushed some candy canes to sprinkle on top.


The easiest way to crush candy canes is to peel off the wrapper, cover the candy cane in a paper towel and hammer away.

I chopped up the chocolate squares and melted them in the microwave.  Then I dipped them in the chocolate using small tongs.  While holding the Ritz with the tongs, I used the back of a spoon to smooth out and remove the excess chocolate.  Then I placed them on a parchment paper covered baking sheet.  


If you want to add peppermint, do so before the chocolate dries.  I did some with peppermint and some without.

When you're done, pop them in the freezer to harden and they'll slide right off the parchment paper.  I stored mine in the fridge in Tupperware between pieces of parchment paper.

They don't taste exactly like Fudge Covered Ritz, but I really enjoyed them, especially the ones with peppermint.  Sidney, on the other hand, did not like them.  She asked if she could just have a Sociable cracker instead!  I swear, every time I go to the trouble of making a Sidney-friendly treat everyone enjoys it except Sidney.  Oh well!

Happy 2013!

Pin It
Related Posts Plugin for WordPress, Blogger...