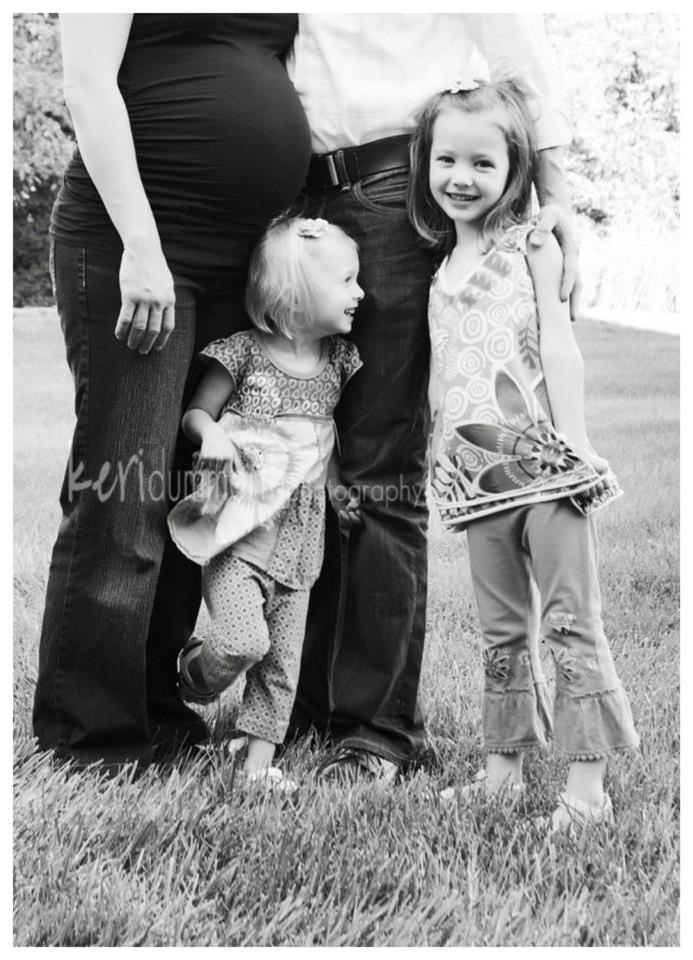
Our CD of maternity photos arrived in the mail! I can't tell you how excited I was to see these pictures. They are all amazing and I have no idea how I will pick the ones I want to print. As my cousin, Kristine, said, "You're going to want to wall paper your walls with these pictures." Our photographer is Keri Dummerth. She has 5 kiddos of her own and was unbelievable with Ava and Sidney. She not only took great photos but she also managed to accentuate my more pleasing areas while hiding my less appealing parts. These are hands down my favorite family pictures yet. I can't wait for her to come back when the baby girl arrives!
Before the photo shoot, I looked around online to get some photo ideas. Here are just a "few" of my favorites (like I said, it is so hard to choose! Keri is amazing!).

I think my favorite thing about fall is all the pumpkin treats I get to eat. My friend, Jenna, gave me this recipe for Gooey Pumpkin Chocolate Chip Cookies and I make them every year (okay, I make them several times a year). They are soooooo yummy so I had to share the recipe.
Ingredients:
1 cup sugar
1 cup canned pumpkin
1/2 cup oil
1 egg
2 cups flour
1/2 tsp salt
1 tsp cinnamon
2 tsp baking powder
1 tsp baking soda
1 tsp milk
1 tsp vanilla
1 cup semi-sweet chocolate chips
Instructions:
1. Preheat the oven to 375 degrees. Line two cookie sheets with parchment paper.
2. In the bowl of a stand mixer, mix together the sugar, pumpkin, oil and egg.
3. In a separate bowl, sift together the flour, salt, cinnamon and baking powder, then slowly add to the stand mixer bowl until combined.
4. Dissolve the baking soda, milk and vanilla in a small bowl and add to the stand mixer bowl.
5. Stir in the chocolate chips.
6. The dough will be sticky so I'd recommend using two spoons to drop the cookie dough onto the parchment paper lined cookie sheets.
7. Bake for 6-8 minutes. I always check them at 6 minutes because you do not want to over bake the cookies. They should be soft and moist when you take them out of the oven.
8. Cool on the cookie sheet until you can remove them and store in an air-tight container.
NOTE: You can also make these into mini muffins. Just lightly spray the muffin tin with non-stick spray first.
This recipe makes ~28 cookies.
I found these cute mosaic sticker kits at Deals. For $1, each kit includes two designs and tons of mosaic stickers to decorate the designs.
Both girls worked at this for a long time and couldn't finish so we put it away and finished it up a few days later. It ended up being a fun project for just $1!
We have a lot to be thankful for, especially this year with another little munchkin on the way!
I find it challenging to teach my girls to be grateful for their blessings. Their little worlds are so simple and innocent. It's all they know. They don't understand that some kids don't have food to eat when they're hungry or shoes to wear outside or a loving and supportive family.
I thought the Thankful Turkey would be a good tool to teach my kids appreciation. And it was pretty easy to make! All you need is poster board, card stock, scissors, double stick tape and a Sharpie.
First I made a turkey using different colored card stock and then I double stick taped it to a piece of poster board. At the top of the poster board I wrote "I'm Thankful For...". I'm planning on laminating the poster board so that I can reuse it year after year.
Then I traced my hand and my girls' hands on fall-colored card stock to make turkey feathers.
Now we can write the things that we're thankful for on the hands and soon our turkey will have lots of beautiful feathers!
You may have noticed that I changed my blog name to Keeping Up with the Kiddos. Lately, it takes all of my energy to keep up with my girls, including the unborn little girl. I am 36 weeks along now. Exhaustion is setting in, but the end is in sight thank goodness. And while that is a very nice thought, it's also a bit overwhelming. Our basement is coming along nicely, but still under construction. The nursery is livable, but not cute. Ava's new bedroom furniture was delivered last week and I sent back 5 of the 9 pieces that we ordered for replacements (seriously Ashley Home Furniture!!!). I haven't packed my hospital bag, washed baby bottles, or gotten the baby clothes out of storage. We have not agreed on a name for this baby. We still need to get our family room carpet cleaned once the basement is finished. Oh, and we need a new roof.
The one and only thing I have accomplished is get the maternity pictures taken. And that almost didn't happen. I found a photographer almost 2 months ago and set up a date to have the pictures taken. Two days before the photo shoot we discussed logistics and photo props, etc. Then...THE DAY BEFORE THE PHOTO SHOOT - VIA VOICEMAIL - SHE CANCELLED AND TOLD ME SHE COULD NOT RESCHEDULE!!!!!! I'm sure that her emergency was greater than my need for maternity photos, but it was quite a scramble. I got on the phone and called another photographer (Keri Dummerth) who filled in at the last minute. I have to say that while I was disappointed that all this blew up at the last minute, I couldn't be more happy with the way it all turned out in the end. Keri is AMAZING. She's my new hero. She is a mom of 5 kids and she is so talented and was unbelievable with our girls. I can't decide which picture is my favorite. We took maternity photos with all three of my pregnancies and this one was by far my most favorite. I can't wait to see how the newborn photos turn out. All's well that ends well!


More maternity pictures to come when I get the CD!! Thanks so much Keri!!!
I think I mentioned that we're finishing our basement right now. Home improvement projects = lots of wood scraps for art projects! I saw an idea for wooden pumpkins that I thought would look great on our front porch. I also wanted to antique them so they'd look more rustic. I have to be honest - this project took some time to finish. Despite Tim's comment ("They do kind of look like pumpkins."), I am really happy with how they turned out.
Here's what I used to make the pumpkins:
- 3 pieces of 1" x 4" wood cut to 12" long (See Note 1 below)
- 3 pieces of 1" x 4" wood cut to 18" long (See Note 1 below)
- 4 pieces of 1" x 4" wood cut to 22" long (See Note 1 below)
- 3 bases for the pumpkins cut from 2' x 2' plywood
- 3 stems for the pumpkins cut from 1" x 1" wood
- Wood sanding pad (80 - 120 grit will do)
- Orange spray paint
- Clear Enamel - High Gloss Finish spray paint (See Note 2 below)
- Brushed Metallic Satin spray paint
- 2 Paint stripping pads (you want something VERY gritty that will strip paint, not sand)
- Brown, Black and Off-white Acrylic paint (used for aging)
- Rags and sponge brushes
- Wood glue
- Metal plate fasteners
- Screws
- Burlap, fall leaves and decorations for the pumpkins
Here's how you make your antique wooden pumpkins:
1. Cut your wood pieces. I don't have a saw so I headed to Lowes to have my pieces cut then I sanded down the cut edges with an 80 grit wood sanding pad.
2. Spray paint your 1 x 4 wood pieces orange.
3. Spray paint your bases and stems Brushed Metallic.
4. To antique the 1" x 4" wood pieces, let the orange paint dry fully and then spray them with the Clear Glossy Enamel paint. I just covered the fronts and sides of the wood with the Clear Glossy Enamel since I wasn't concerned with antiquing the back sides of the pumpkins. Also, see Note 2 below.
5. When the 1" x 4" wood pieces have dried, generously sand/strip the boards using a very gritty paint stripping pad. Concentrate on the high parts as well as the edges and corners. The more paint you strip, the older the boards will look.
6. Now it's time to apply the aging coat of paint. I mixed a brown acrylic paint with a bit of white acrylic and a tiny bit of black acrylic paint. Then I watered it down until it looked like brownish water. I tried out the mixture on the side of one of my boards to make sure I liked the concentration. Also, as the mixture dries, it will lighten a bit.
7. Quickly apply the mixture with a sponge brush to all the sanded areas. As soon as it is applied, wipe off the paint with a rag. The longer you let the mixture stay on the wood, the darker it will stain it. I did one board at a time, so as to not let the mixture set too long. This dyes the raw wood with a brownish color and puts a slight darker shade over the orange painted areas.
8. After the aging paint dries, turn your boards so the backs are facing up and use your wood glue to hold the sides of the boards together. I felt like I needed a stronger hold so I also drilled metal plates to the back of the boards. The longer boards needed more plates.
9. Drill the bases to the bottoms of the boards, then flip them right side up and hot glue the stems to the tops of the pumpkins. Now you can decorate your pumpkins!
10. I hot glue gunned fall leaves to the base of the pumpkins and wrapped fall stems in burlap.
Notes:
1 - Rough cut lumber is easier to antique and is sold at Lowes and Home Depot. I used what I had available, which was not rough cut, and was still able to antique it.
2 - I'm not sure how necessary this step is. The clear coat is supposed to seal the paint from soaking up the aging paint that you apply later, but it seemed to me like I stripped all of the clear enamel off my wood.