Pages

Monday, June 22, 2015

DIY Guitar Picks

I have to say that I was pretty impressed by the Father's Day gift that the girls and I made for Tim this year.  It was hard to beat the Daddy Date Cards we  made a couple years ago, but I think we did it.

Ever since we discovered Shrinky Dinks, the girls have been begging me to do them again. I found a DIY Shrinky Dink tutorial online and we made these cute little guitar picks for Tim.


Two things amazed me: 1. It was so inexpensive and 2. It actually worked!


Here are the supplies you'll need to make your own Shrinky Dinks:
- permanent markers (we used Sharpies)
- foil
- paper bags to cover your table when coloring with permanent markers
- nail file or sand paper (optional)
- template (I found my guitar pick template online here. To make a different template, enlarge a picture to 250% and cut it out.)
- #6 plastic (This can be found in many food packaging materials, such as clear takeout containers. We used disposable cake pan lids that we purchased at Dollar Tree. Look for the number 6 inside the triangle.)

To make your Shrinky Dinks:
1. Preheat your oven to 325 degrees.

2. Make a template.  We were making guitar picks so I found an enlarged image of a guitar pick online here and here. You could also copy a pick at 250% of its original size. Cut out the enlarged image and traced it onto sturdy paper (to make for easier tracing on the plastic).

3. Cut the plastic into a flat sheet and trace the guitar pick template. I used a thin black Sharpie to trace the pick.

4. We did not sand the plastic (I didn't like the way it looked scratched up when sanded), but if you lightly sand one side of the plastic and color on that side, the marker will adhere better. Without sanding, the marker will likely start to scratch off after awhile unless you are also planning on using a sealer on it.

5. Cut out your picks and start coloring with your permanent markers.  Remember that the designs will shrink down considerably so you may want to make smaller, more simple designs. I traced along the border of the picks with a thick Sharpie, which gave it a nice border and "erased" the thin black Sharpie lines that remained after I cut out the picks.


6. Place the picks on a “cookie sheet” crafted from foil. You can also use a regular cookie sheet lined with foil, but it makes the shrinking process take a little longer.

7. Place the picks into the oven (we did two at a time), and after about a minute they will start to bubble, shrink and curl up. Don’t worry about the curling – they will flatten themselves out as the shrinking process finishes.

8. Carefully remove them from the oven – if you’re still concerned that they’re not perfectly flat, you can place something flat and heavy (we used a book) on them while they cool, but you’ll have to work quickly as they cool very fast.


Rock on!


Pin It

Monday, June 1, 2015

Pre-K Letter of the Week Projects


For each letter, my preschooler and I did the following: 
- art projects for the capital and lower case letters (using mostly items you can find around your house)
- writing the capital and lower case letters
- sight words beginning with the letter
- books that related to our art projects.

Click the links below for a guide for each letter:
- Letter Aa
- Letter Bb
- Letter Cc
- Letter Dd
- Letter Ee
- Letter Ff
- Letter Gg
- Letter Hh
- Letter Ii
- Letter Jj
- Letter Kk
- Letter Ll
- Letter Mm
- Letter Nn
- Letter Oo
- Letter Pp
- Letter Qq
- Letter Rr
- Letter Ss
- Letter Tt
- Letter Uu
- Letter Vv
- Letter Ww
- Letter Xx
- Letter Yy
- Letter Zz

Sidney loves looking at her big stack of letter projects.  I know we can't save them forever so I made her a Shutterfly photo book.  Click here to see the photo book.

To see more letter project ideas, check out my "Letter of the Week" Pinterest board.

Pin It

Wednesday, May 27, 2015

Letter of the Week - Zz


Z is for Zipper
Here's what you need for this project:
- cardstock (2 different colors)
- zipper from craft store
- glue


Click here for free printable Upper Case Letter templates.

Z is for Zebra
Here's what you need for this project:
- cardstock (3 different colors)
- googly eye
- glue


Click here for free printable Lower Case Letter templates.

Sight Words
This week's Sight Word is:
- zoo

Handwriting


Books
Here are some library books we reserved to go along with our theme:


Pin It

Thursday, May 21, 2015

Last Day of School Gift - Teacher Fingerprint Tree

I have such a hard time coming up with gifts for teachers.  This year was made much easier by Balancing Home and their free Classroom Fingerprint Tree printable.


I used SmallPDF to convert the file to a .jpg file so that I could crop it and edit it in PicMonkey to add the school year (2014 - 2015).

I packed one "grass green" stamp pad, an Ultra Fine tip black Sharpie, a clipboard for a hard surface and a container of wipes (for the kids to wipe their hands) and stopped by school during recess to get all the kids' fingerprints for the tree. Here's the finished product:


I used my paper cutter to cut down the tree picture.  Then I double stick taped it to a piece of green card stock and put it in a black 8x10 frame.  Hobby Lobby's frames are always 50% off and they have a pretty good selection.  I also found a metal butterfly in the craft section at Hobby Lobby to dress up the frame.


I can't believe the school year is over already.  We are really going to miss our wonderful 1st grade teacher.

Pin It

Monday, May 18, 2015

Letter of the Week - Yy


Y is for Yak
Here's what you need for this project:
- cardstock (4 different colors)
- black marker
- glue


Click here for free printable Upper Case Letter templates.

Y is for Yarn
Here's what you need for this project:
- cardstock (2 different colors)
- yarn
- scissors
- glue


Click here for free printable Lower Case Letter templates.

Sight Words
This week's Sight Word is:
- you

Handwriting


Books
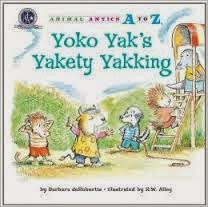
Here are some library books we reserved to go along with our theme:


Pin It
Related Posts Plugin for WordPress, Blogger...